Introduction / Why You Need This
Example output of df -h
Disk space runs out quickly, especially on servers with heavy logging or workstations storing large amounts of media. When a partition reaches 95–100% capacity, the system starts to slow down, services fail to write temporary files, and package updates crash. This guide will help you pinpoint exactly where your gigabytes are going in just a few minutes, and safely free up space without risking system damage.
Prerequisites / Preparation
Before you begin, ensure you have:
- Access to a terminal (locally or via SSH).
- Superuser privileges (
sudo) to scan system directories. - An internet connection, in case you need to install additional utilities.
💡 Tip: All commands in this guide are universal and work on Debian/Ubuntu, RHEL/CentOS, Fedora, and Arch Linux. Only the package installation commands differ.
Step 1: Check Overall Disk Usage
Open a terminal and run the basic command:
df -h
The -h flag enables human-readable output (displayed in G, M, K). You will get a table where you should pay attention to:
- Mounted on — the mount point (e.g.,
/or/home). - Use% — the percentage of used space.
- Avail — available space.
If the root / or /home partition is over 90% full, proceed to locate the specific directories consuming the most space.
Step 2: Find Directories Taking Up the Most Space
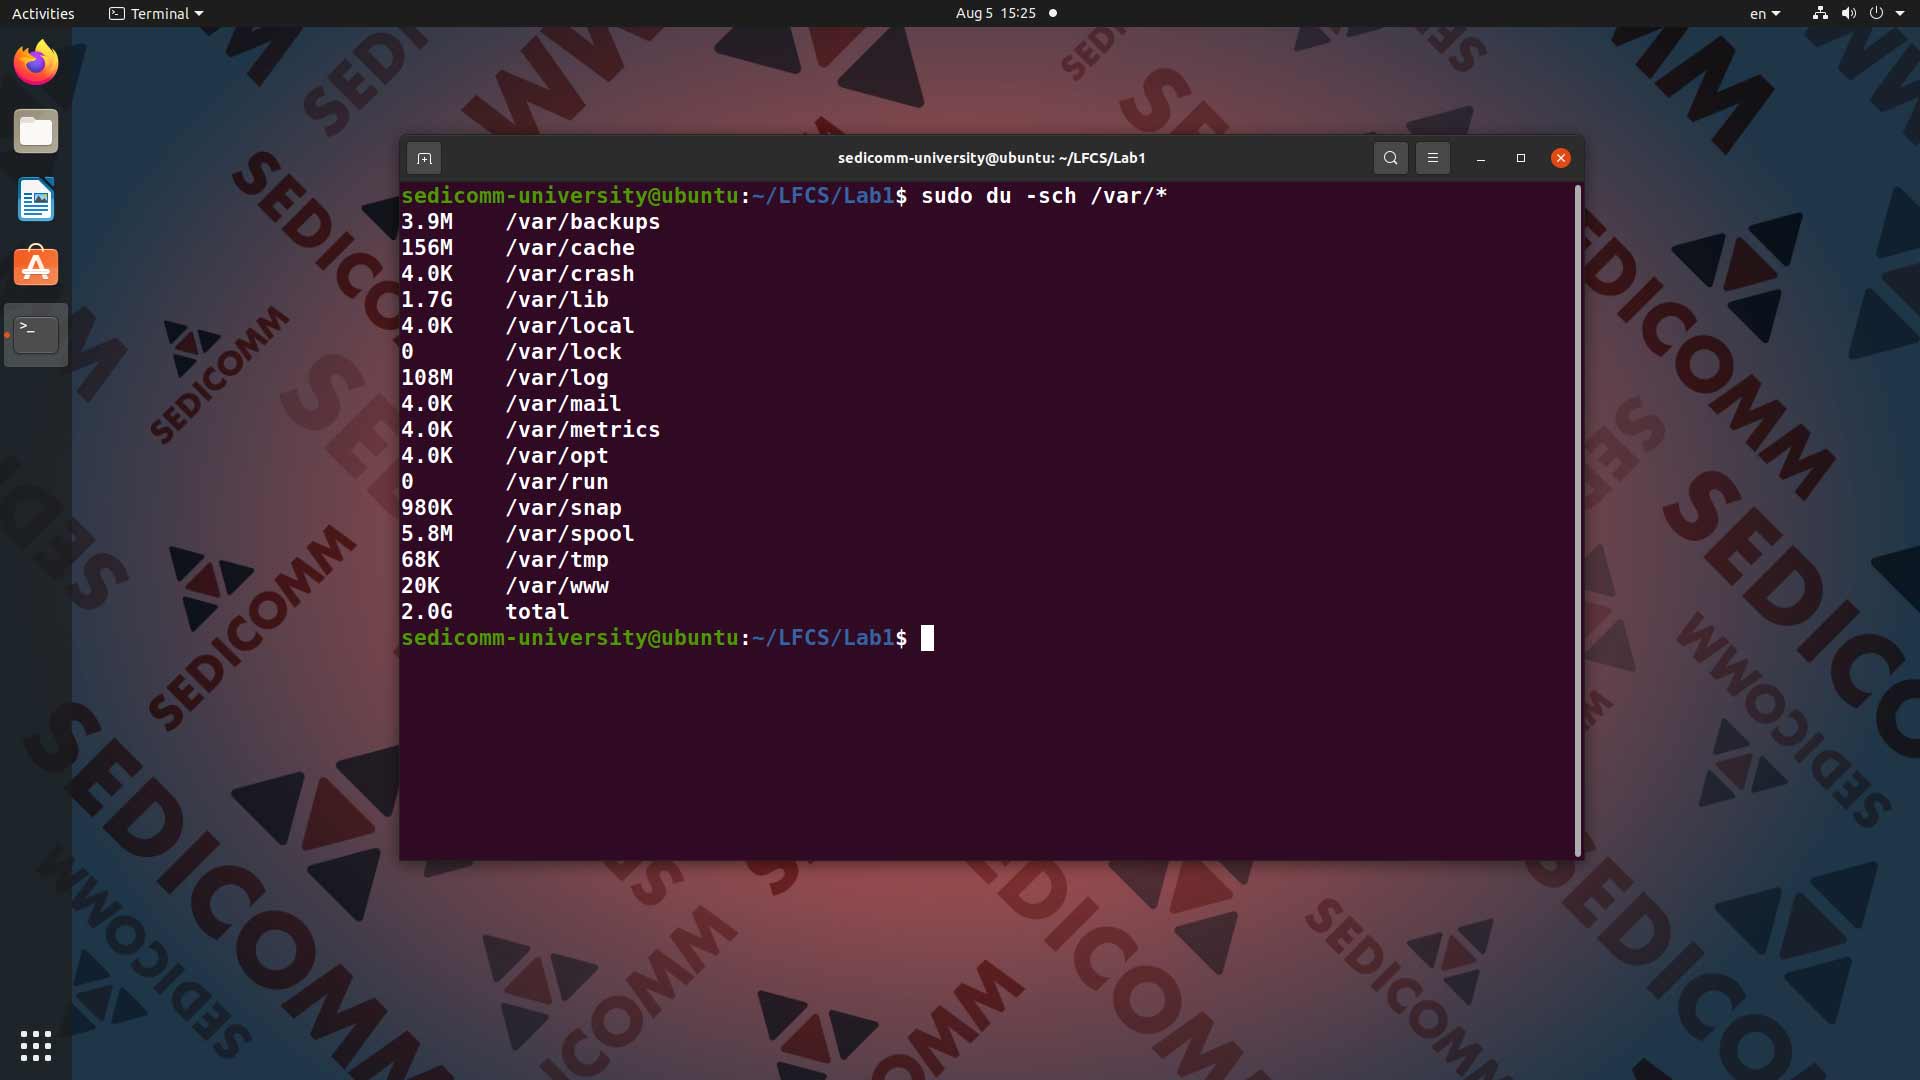
Example of sorted du output
The df command shows the big picture but doesn't tell you where the large files are located. To scan the root directory and sort the results by size in descending order, use:
sudo du -sh /* 2>/dev/null | sort -rh | head -n 10
Flag breakdown:
-s— show the total size for the specified directories only.-h— output in a human-readable format (GB, MB).2>/dev/null— suppress permission errors when accessing system virtual filesystems.sort -rh— reverse human-numeric sort.head -n 10— display only the first 10 lines.
Note the directory with the largest size and navigate into it. Repeat the command, replacing /* with folder_name/*, to drill down into the structure.
Step 3: Run an Interactive Disk Analyzer
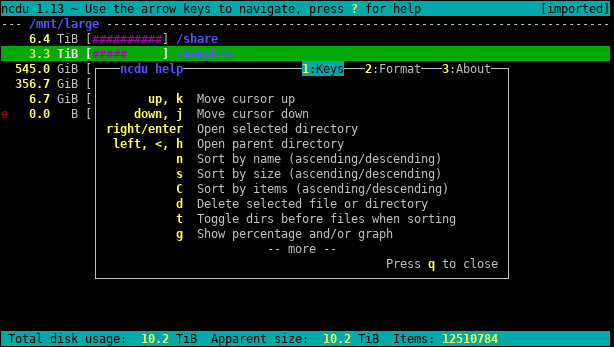
ncdu interface
For quick navigation and file deletion directly in the terminal, ncdu is the best tool. Install it with:
# For Debian/Ubuntu
sudo apt update && sudo apt install ncdu

# For RHEL/CentOS/Fedora
sudo dnf install ncdu
Start scanning the target mount point:
sudo ncdu /
The utility will scan the files and open an ncurses-based text interface. Navigation is intuitive:
- Arrow keys — navigate through the list.
Enter— open the selected directory.d— mark a file/directory for deletion (confirm by pressingy).?— open the keyboard shortcuts help.q— exit the program.
⚠️ Important: Do not delete system directories (
/usr,/lib,/var/lib/dpkg, or/var/lib/rpm) or hidden configuration files (~/.config,~/.local) unless you are absolutely sure of their purpose. Doing so may render your system unbootable.
Verify the Results
After cleaning up, run the initial check again:
df -h /
Ensure that the Avail column shows a few gigabytes of free space and that Use% has dropped below 85%. To extend the lifespan of SSDs, it is recommended to keep at least 10–15% of the total capacity free.
Troubleshooting
Operation not permittedorPermission deniedwhen runningdu
Run the command withsudo. Regular users do not have permission to read system or other users' directories.dfoutput doesn't update after deleting files
A process (e.g., a web server or logging service) still holds the deleted file open. Restart the relevant services (sudo systemctl restart nginxor similar) or reboot the system.ncduhangs during scanning
This happens when scanning network mounts (/mnt,/media, NFS). Run the utility with the-xflag (restrict to one filesystem) or explicitly specify the path:ncdu -x /var.