Introduction / Why You Need This
Cache consists of temporary files that applications create to speed up loading times and reduce CPU and network load. Over time, the cache folder can grow to several gigabytes, accumulate outdated or corrupted data, and start interfering with system performance. You'll notice this through sluggish UI responsiveness, sudden application crashes, and low disk space. Regular clearing resolves these issues without deleting personal documents, settings, or game saves.
Requirements / Preparation
Before you begin, ensure you have administrator privileges (for Windows) or access to system settings (macOS, Android, iOS). Close any background processes that might be locking cache files. If you're using a laptop, plug it into a power source to prevent the process from being interrupted by power-saving modes.
Step-by-Step Instructions
Step 1: Closing Applications and Background Services
Clear all interfering processes from memory. Open Task Manager (Ctrl + Shift + Esc on Windows or Activity Monitor on macOS), locate the target applications, and click End task or Quit. On mobile devices, fully close apps via the multitasking menu. This prevents "File in use" errors and ensures the directory is completely cleared.
Step 2: Using Built-in Cleanup Tools
Operating systems provide safe methods for removing temporary data. On Windows 10/11, navigate to Settings → System → Storage → Temporary files, check the boxes for Cache and Temporary files, then click Remove files.

Clearing temporary files in Windows 11
On Android, open Settings → Apps, select the target app, go to the Storage section, and tap Clear cache.
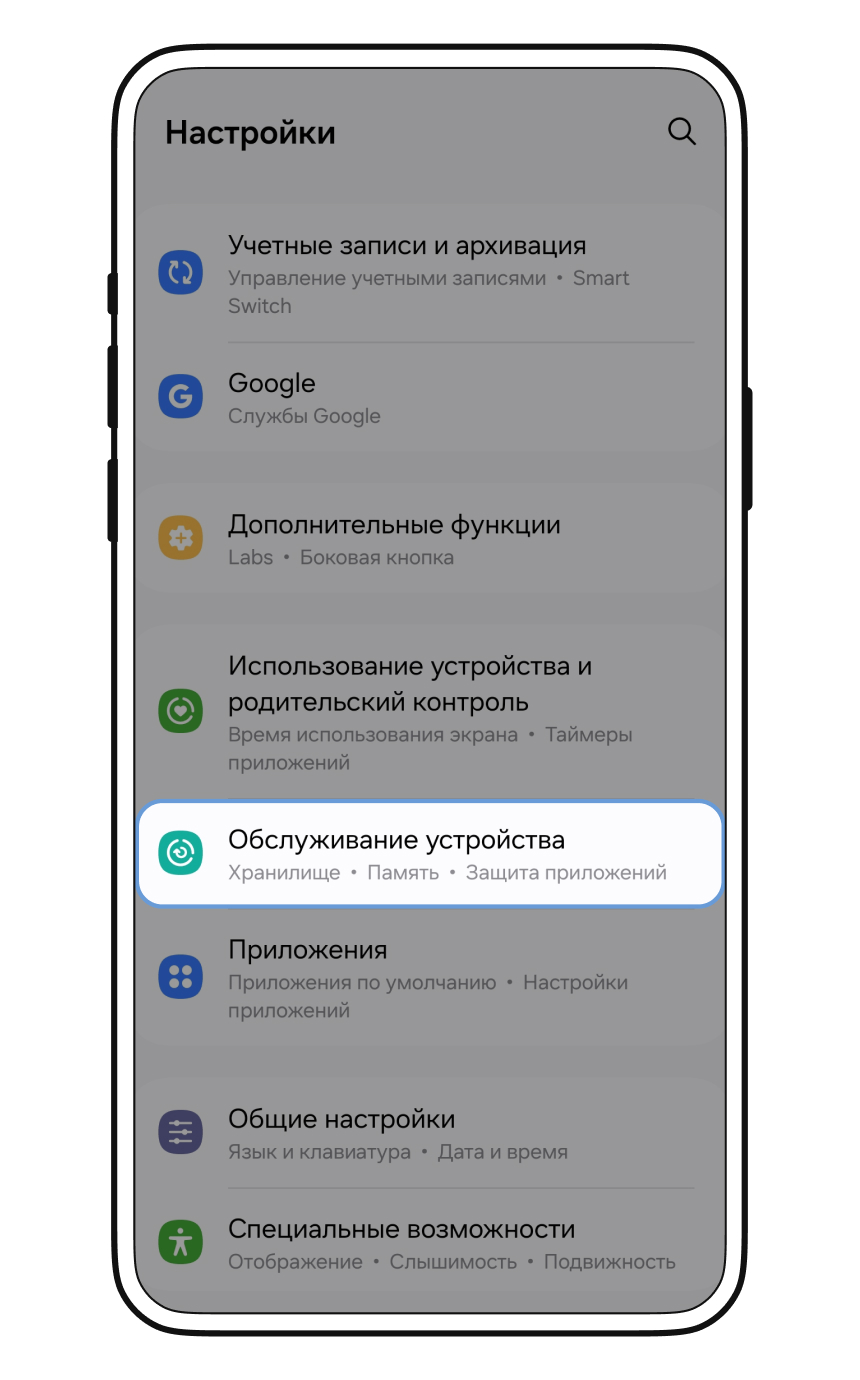
Clearing app cache on Android
This method only removes temporary data, leaving your logins and personal files untouched.
Step 3: Manually Clearing System Directories
If built-in utilities didn't free up enough space, clear the cache manually. Open File Explorer or Terminal and navigate to the cache folder. On Windows, use the Run dialog (Win + R) and enter:
%localappdata%\Temp
Select all contents (Ctrl + A) and delete them. Skip any files the system refuses to delete due to active locks. On macOS, open Finder, press Cmd + Shift + G, enter ~/Library/Caches, and move the folder contents to the Trash.
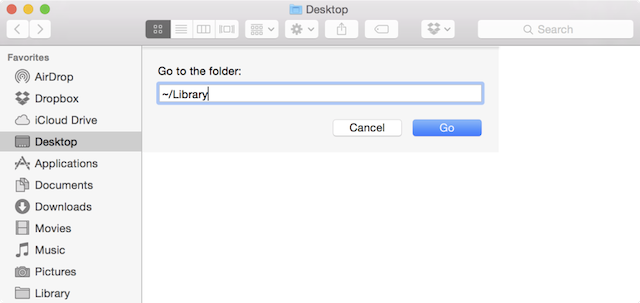
Accessing the macOS cache folder via the Go menu
For Linux, run:
rm -rf ~/.cache/*
💡 Tip: Do not delete the cache folders themselves, only their contents. This preserves the directory structure and speeds up the creation of new files the next time the applications launch.
Verifying the Results
Restart your device to reset cached system processes. Open the applications you maintained. The first launch may take 3–5 seconds longer than usual—this is normal, as the system regenerates fresh temporary files. Check available space in your disk or storage properties: you should see an increase ranging from 500 MB to several gigabytes, depending on how frequently you use the software.
Common Issues
You may encounter the following common scenarios during cleanup:
- "Access denied" error — occurs when attempting to delete files currently in use by Windows services or system processes. Run the cleanup in Safe Mode or simply skip the locked items.
- App stopped saving progress — cache and app data are stored in separate locations. If you accidentally tapped
Clear datainstead ofClear cache, open the app settings and log in again. Cloud synchronization will restore your progress. - Insufficient disk space — the cache might only be part of the problem. Check if the partition is filled with system updates or old backups, and consider using disk compression tools.