Introduction / Why You Need This
ADB (Android Debug Bridge) is a utility that allows you to manage your smartphone from a computer. Without the correct drivers, Windows will only recognize the device as an external storage drive or ignore it completely. Installing the proper components grants access to file transfers, command-line app installation, log extraction, and system recovery after crashes. After following this guide, your PC will reliably recognize your Android device in debugging mode.
Requirements / Preparation
Before you begin, ensure the following basic requirements are met:
- A PC running Windows 10 or 11.
- An original or certified USB cable that supports data transfer. Charge-only cables do not transmit ADB signals.
- Access to a computer account with administrator privileges.
- A smartphone running Android 8.0 or higher.
Step-by-Step Instructions
Step 1: Download Official Tools
Do not use unverified driver packs from third-party websites. The official package from Google guarantees security and compatibility.
- Go to the Google Platform-Tools download page.
- Download the Windows archive (
platform-tools-latest-windows.zip). - Extract the contents to the root of your
C:\drive or any other folder with a simple path, such asC:\adb.
⚠️ Important: Avoid Cyrillic characters and spaces in the directory name. Windows Terminal may return syntax errors when running commands in such paths.
Step 2: Enable Debugging on Your Smartphone
Enabling USB debugging in Developer Options
Your computer will not be able to connect until Android explicitly allows the debugging connection.
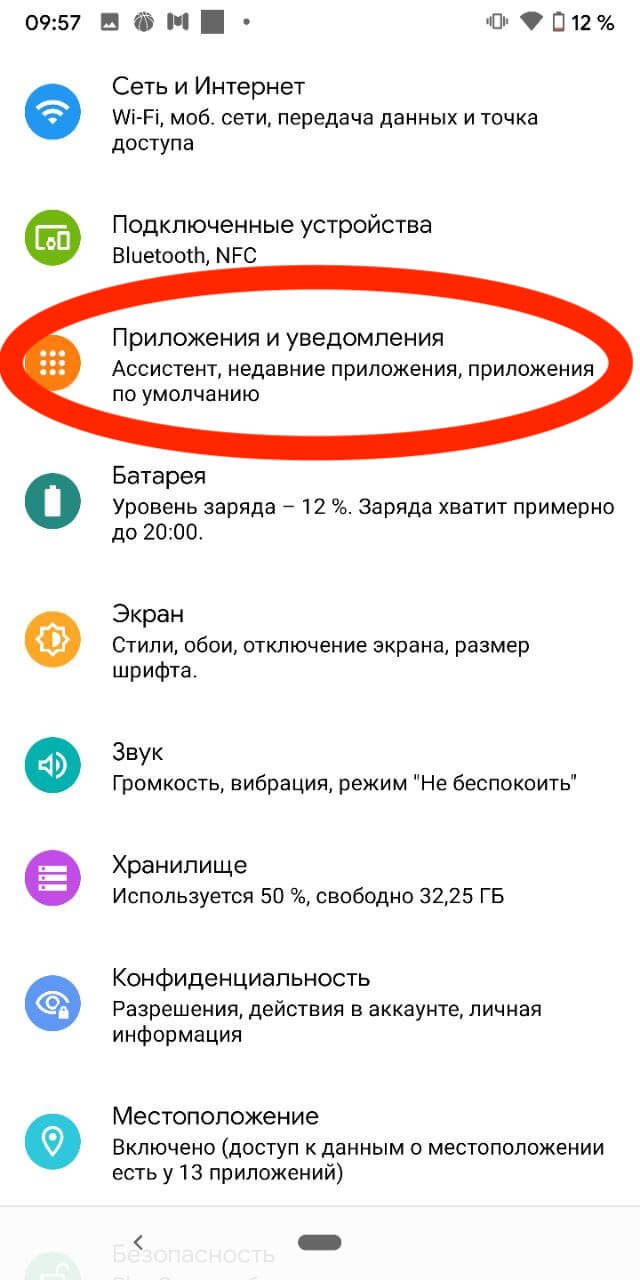
- Open Settings → About phone.
- Find Build number and tap it 7 times in quick succession. A notification will appear stating "You are now a developer!"
- Return to the main Settings menu and open the newly added Developer options section.
- Toggle on USB debugging.
- Connect your phone to the computer. A prompt will appear on your smartphone screen asking for authorization — check Always allow from this computer and tap OK.
Step 3: Manually Install Drivers via Device Manager
Manually updating the driver via Device Manager
Windows often automatically installs the standard MTP driver, which does not support ADB commands. You will need to replace it manually.
- Press
Win + R, typedevmgmt.msc, and press Enter. - Download and extract the official
Google_USB_Driverto theC:\GoogleUSBfolder. - In Device Manager, locate your device (usually under Portable Devices, Android Device, or Other devices).
- Right-click the device → Update driver → Browse my computer for drivers → Browse.
- Specify the path to the
C:\GoogleUSBfolder and click Next. The system will automatically select a compatible component (typicallyAndroid Composite ADB Interface).
💡 Tip: If Windows cannot find the driver manually, select Search automatically for updated driver software — in most cases, the system will pull the required package from Microsoft's official repository.
Step 4: Configure Environment Variables
To run adb from any directory without constantly navigating to the terminal, add its path to the system PATH.
- Press
Win + S, type Environment Variables, and open Edit the system environment variables. - Click the Environment Variables button. Under System variables, find the
Pathentry, select it, and click Edit. - Click New and paste the path to your utilities folder (e.g.,
C:\adb). - Save the changes, close all windows, and restart PowerShell or Command Prompt.
Verifying the Result
Verify that the system has established the connection correctly.
- Open your terminal.
- Enter the following command:
adb version
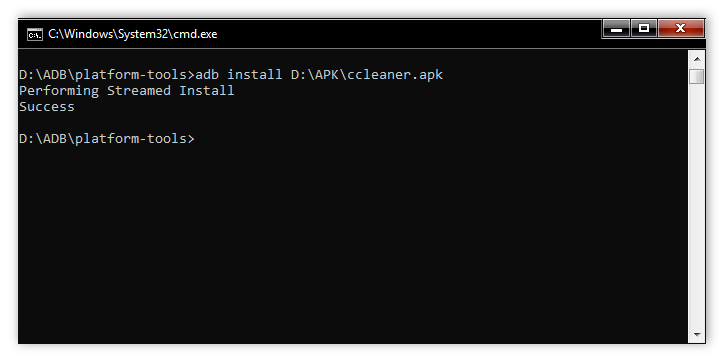
The terminal should return the current version of the utility. 3. Run:
adb devices
Your smartphone's serial number should appear in the list with the status device. This indicates that the drivers are working correctly and the phone is ready to receive commands.
If the status shows unauthorized, unlock your phone screen and confirm the debugging prompt. A status of offline indicates a cable issue or a stuck process — restart the service using the adb kill-server and adb start-server commands.
Troubleshooting
- Device is recognized as "Unknown USB Device (Device Descriptor Request Failed)". This is usually a physical connection issue. Try a different port (preferably a USB 3.0 port directly on the motherboard) and replace the cable with a known working data cable.
- Windows blocks installation due to a digital signature. In the driver selection window, uncheck Show compatible hardware. In the expanded list, find
Android Device→Android ADB Interface. This is a standard Microsoft driver that bypasses OEM signature restrictions. - The
adb devicescommand returns an empty list. Ensure that File Transfer (MTP) or PTP mode is selected in the developer options on your phone. Some custom ROMs block ADB connections if "Charge only" mode is active.