What the JVM Launcher Error Means
JVM Launcher error window with a message about being unable to find the Java Runtime Environment
The JVM Launcher error (Java Virtual Machine Launcher Error) occurs when Windows cannot start the Java virtual machine to run a Java application. It appears when attempting to open a .jar file or launch a Java program and is often accompanied by messages such as:
Could not find Java SE Runtime EnvironmentError: could not find java.dllThe system cannot find the path specified
The error code in system logs (e.g., Event Viewer) may vary. Common codes include 0x80070057 (invalid parameter) or 0x80070005 (access denied). This error blocks the launch of any Java application, from simple utilities to complex IDEs.
Causes
The JVM Launcher error is usually caused by one of the following:
- Missing or corrupted Java installation — Java is not installed, is partially installed, or its files are corrupted.
- Incorrect
PATHenvironment variable — the system cannot find Java executables (java.exe,javaw.exe) because the path to the Javabinfolder is not added toPATHor is specified incorrectly. - Java version conflict — multiple versions of Java are installed (e.g., JDK and JRE), causing conflicts. Or the program requires a specific version that is missing.
- Insufficient permissions — the current user lacks permissions to execute Java files or access Java folders.
- Registry corruption — Java entries in the Windows registry are missing or corrupted, preventing launch.
- Antivirus or firewall — some security programs block the execution of Java files, mistakenly identifying them as threats.
Solutions
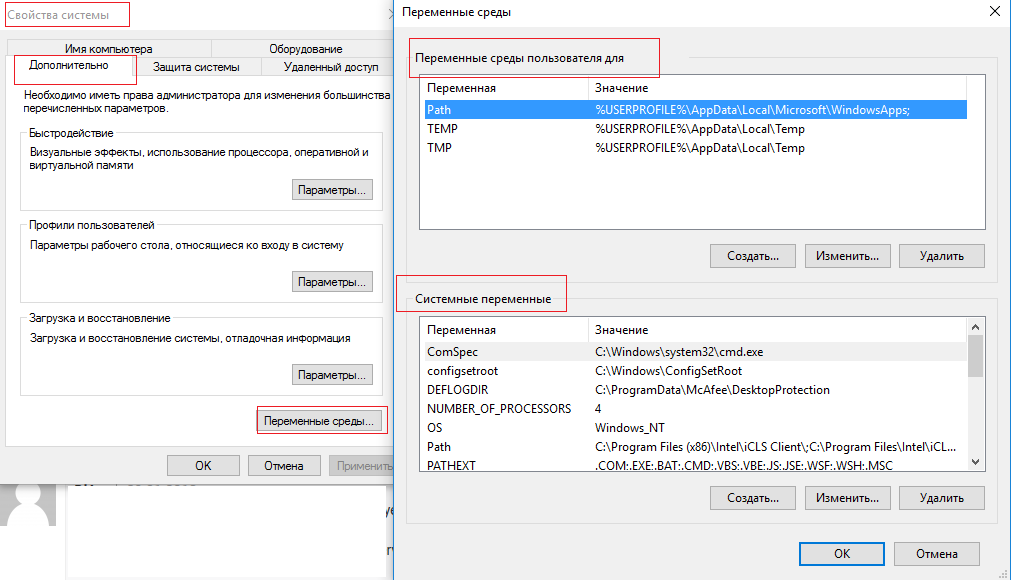
Dialog window for editing the system PATH variable in Windows 10 or 11
Here are proven methods to fix the error, ordered from simplest to most complex. Start with the first method and proceed sequentially if the issue persists.
Method 1: Check and Install Java
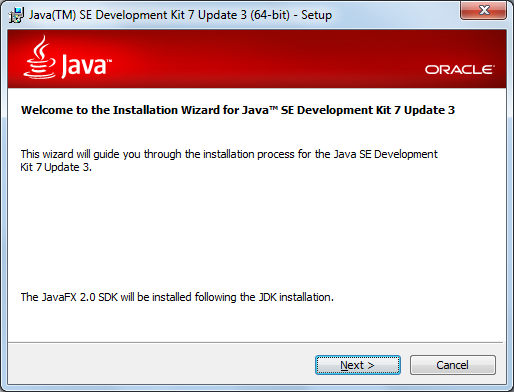
Oracle Java Development Kit installer for Windows with the 'Add to PATH' option
First, ensure Java is installed and accessible from the command line.
- Open Command Prompt (press
Win + R, typecmd, press Enter). - Enter the command:
java -version - If you see Java version information (e.g.,
java version "11.0.20"), Java is installed. If you see a message like'java' is not recognized as an internal or external command..., Java is not installed or not added toPATH. - If Java is missing, download and install the latest version from the official site:
- Oracle JDK: https://www.oracle.com/java/technologies/downloads/
- OpenJDK: https://adoptium.net/ During installation, check the "Add to PATH" option (if available).
- After installation, restart your computer and check
java -versionagain.
Method 2: Configure the PATH Environment Variable
If Java is installed but not recognized, manually add the path to the Java bin folder to the system PATH variable.
- Determine the path to your Java
binfolder. Typically:- For JDK:
C:\Program Files\Java\jdk-11.0.20\bin - For JRE:
C:\Program Files\Java\jre-11.0.20\binIf unsure, look for theJavafolder inC:\Program Files\orC:\Program Files (x86)\.
- For JDK:
- Open System Properties:
- Press
Win + Pause/Break→ Advanced system settings → Advanced tab → Environment Variables button.
- Press
- Under System variables, find the
Path(orPATH) variable, select it, and click Edit. - Click New and add the full path to the Java
binfolder (e.g.,C:\Program Files\Java\jdk-11.0.20\bin). - Click OK on all windows and restart any open command prompts or applications.
- Verify by running
java -versionin a new command prompt.
Alternative via PowerShell (Administrator):
$javaPath = "C:\Program Files\Java\jdk-11.0.20\bin"
[Environment]::SetEnvironmentVariable("Path", $env:Path + ";$javaPath", "Machine")
Replace the path with your own. Restart your computer afterward.
Method 3: Reinstall Java
If the previous steps didn't help, the Java installation might be corrupted. Completely uninstall and reinstall Java.
- Open Control Panel → Programs and Features.
- Find all entries related to Java (e.g.,
Java SE Development Kit,Java SE Runtime Environment) and uninstall them. - After uninstalling, check if any Java folders remain in
C:\Program Files\Java\. If so, delete them manually (requires administrator privileges). - Download a fresh version of Java from the official site (an LTS version like Java 11 or 17 is recommended).
- Run the installer and ensure the "Add to PATH" option is checked (if present).
- After installation, restart your computer and test the Java application.
Method 4: Run the Program as Administrator
Sometimes the error is caused by insufficient permissions. Try running the Java application with elevated privileges.
- Locate the program's executable file (
.exeor.jar). - Right-click it and select "Run as administrator".
- If the program launches, the issue is permissions-related. For a permanent fix:
- Right-click the file → Properties → Compatibility tab.
- Check "Run this program as an administrator" → Apply.
⚠️ Note: Permanently running as administrator may be insecure. Use this method only for diagnostics or if the program genuinely requires elevated rights.
Method 5: Repair System Files and Registry
If the error is related to corrupted system files or Java registry entries, perform a repair.
- Check system file integrity:
- Open Command Prompt as Administrator (Win + X → Command Prompt (Admin)).
- Run:
sfc /scannow - The process takes 10-20 minutes. Restart your computer after completion.
- Repair the Java registry (if entries are corrupted):
- Uninstall Java as in Method 3.
- Use the Microsoft Program Install and Uninstall Troubleshooter (https://support.microsoft.com/en-us/help/17588/windows-fix-problems-that-block-programs-being-installed-or-removed) to clean leftover Java registry entries.
- Reinstall Java.
Method 6: Check Antivirus and Firewall
Antivirus programs sometimes block Java file execution.
- Temporarily disable your antivirus and firewall (e.g., Windows Defender).
- Try to run the Java application.
- If the error disappears, add the Java folder (e.g.,
C:\Program Files\Java\) and the program's folder to your antivirus's exclusions list. - For Windows Defender: Windows Settings → Update & Security → Windows Security → Virus & threat protection → Manage settings for antivirus and firewall.
Prevention
To avoid encountering the JVM Launcher error again:
- Keep Java updated — use the latest stable versions (LTS), but verify compatibility with your programs.
- Monitor the
PATHvariable — after installing new software that might modifyPATH(like other Java versions), ensure the path to your required Java version is at the top of the list or is the only one present. - Avoid multiple Java installations — if possible, keep only one JDK/JRE version. Uninstall older versions via Control Panel.
- Back up the registry before making any Java-related changes.
- Run programs as a standard user rather than as an administrator, unless required, for security.
- Periodically verify your Java installation using
java -versionand test runs of your applications.